
IFS is now a part of Imperial Brady
Log in using your current username. This is normally your customer ID or email. When you first log in you will need to update your information.
Note: if you have any trouble logging into the website please contact your account adminstrator or customer support at onlineordering@imperialbrady.com.
Welcome to Imperial Brady!
Individual FoodService has transitioned their digital experiences to Imperial Brady.
Whether you are using the website or the app Imperial Brady's digital experience provides you with comprehensive solutions, the ability to search your entire product catalog, access to your account information, and documents.
Features of imperialbrady.com
- Easy ordering
- Plan your budgets
- Track orders & see your POD
- Pay invoices
- View all orders
- Manage users
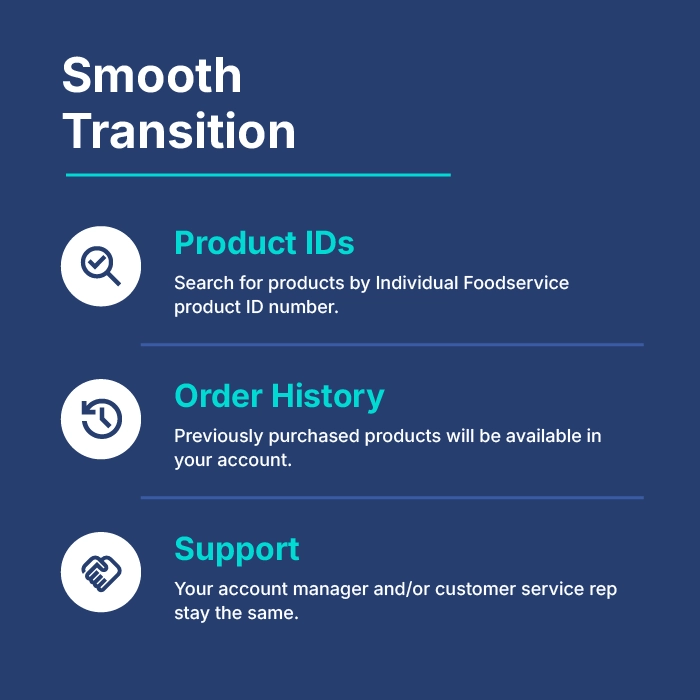
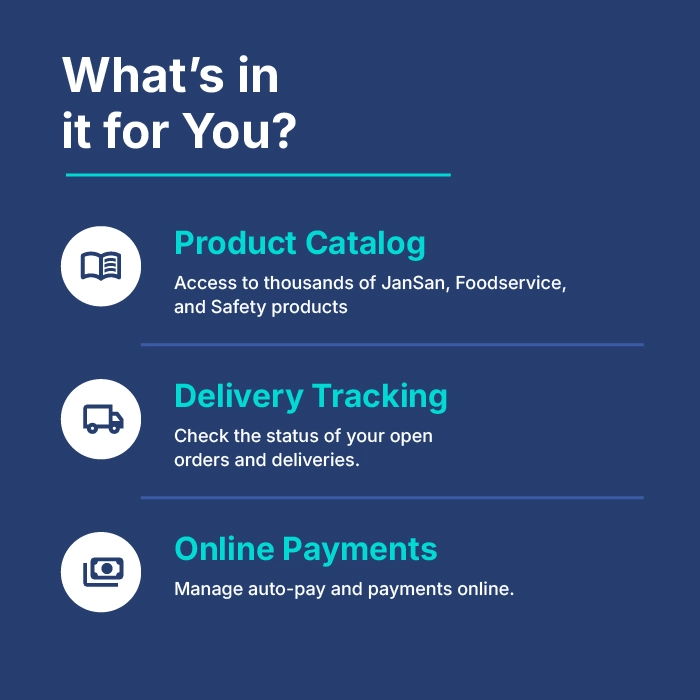
Seamless shopping with incredible features

Our website offers easy access to Imperial Brady's Supplies + Support to drive your business forward.
From managing your account to getting better product recommendations imperialbrady.com supports your business
- Detailed product page information with images, specs, and downloadable information
- Ability to quickly filter, find, and compare the best products for your business
- Easy barcode scanner and voice search capibilities with the Imperial Brady mobile App.


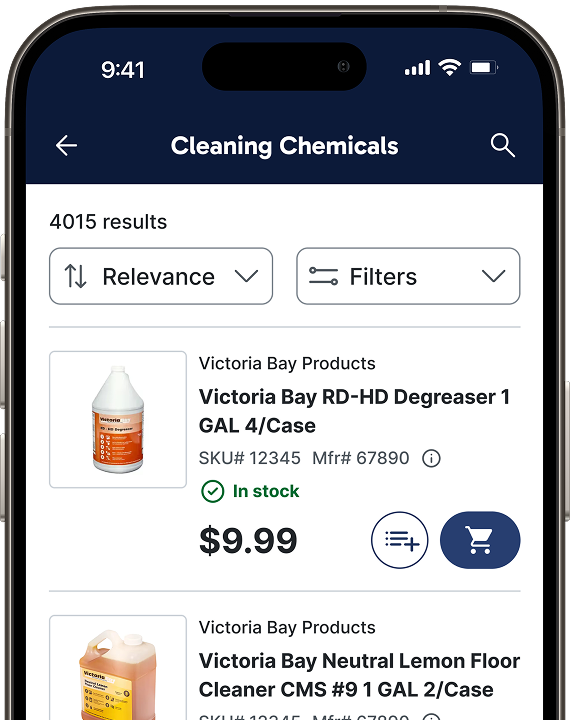
Download the Imperial Brady mobile app today!



Create a New List
Note: You must be signed in to your Imperial Brady account to follow the instructions below.
- To create a list, select the My Lists icon located in the upper-right corner of the main menu.
- Click the Create new list button. The Create new list sidebar will appear.
- Enter a name for your new shopping list in the List Name field.
- Click the Create a list button located within the sidebar.
- From the My Lists page, select the name of the newly created shopping list.
- Click the Add Products button.
- In the sidebar, enter the desired SKU# and Qty in the appropriate fields.
- Note: To add multiple products, click Add more lines, then enter the SKU# and Qty for each additional product. Repeat this step until all desired products have been entered.
- Once all desired products have been entered, click the Add to List button to add them to your shopping list.
Adding Items to an Existing Shopping List
Note: If a Lock icon is visible next to a list’s name, only the list owner can make changes. Any changes made by the list owner will update automatically. Additionally, you must be signed in to your Imperial Brady account to follow the instructions below.
- To add items to a list, select the My List icon located in the upper-right corner of the main menu.
- Note: If the list you wish to edit is not visible, use the Search by list name field. You can also narrow your results using the All lists and Sort By: Date modified dropdown filters.
- Select the List name you wish to modify.
- Click the Quick Add button.
- In the sidebar, enter the desired SKU# and Qty for the product you wish to add.
- Note: To add multiple products, click Add more lines, then enter the SKU# and Qty for each additional product. Repeat this step until all desired products have been entered.
- Once all desired product(s) have been entered, click the Add to list button to add them to your shopping list.
Remove Items from a List
Note: If a Lock icon is visible next to a list’s name, only the list owner can make changes. Any changes made by the list owner will update automatically. Additionally, you must be signed in to your Imperial Brady account to follow the instructions below.
- To remove an item from a list, select the Lists icon located in the upper-right corner of the main menu.
- Note: To add multiple products, click Add more lines, then enter the SKU# and Qty for each additional product. Repeat this step until all desired products have been entered.
- Select the List name you wish to modify.
- Click Remove next to the product you want to delete from the list.
Share a List Without Allowing Editing
Note: If a Lock icon is visible next to a list’s name, only the list owner can make changes. Any changes made by the list owner will update automatically. Additionally, you must be signed in to your Imperial Brady account to follow the instructions below.
- To share a shopping list, select the My Lists icon located in the upper-right corner of the main menu.
- Note: If the list you wish to share is not visible, use the Search by list name field. You can also narrow your results using the All Lists and Sort By: Date Modified dropdown filters.
- Select the list name you wish to share.
- Click List Actions, then select Share List.
- In the Share List sidebar, select No for Would you like to assign editors from the selected accounts?
- Click the Share List button in the sidebar to apply your changes.
Share a List and Allow Editing
Note: You must be signed in to your Imperial Brady account to follow the instructions below. If a Lock icon appears next to a list name, only the list owner can make changes. Any changes made by the list owner will be updated automatically for all users with access to the list.
- To share a shopping list, select the My Lists icon located in the upper-right corner of the main menu.
- Note: If the list you wish to share is not visible, use the Search by list name field. You can also narrow your results using the All Lists and Sort By: Date Modified dropdown filters.
- Note: If the list you wish to share is not visible, use the Search by list name field. You can also narrow your results using the All Lists and Sort By: Date Modified dropdown filters.
- Select the list name you wish to share.
- Click List Actions, then select Share List.
- In the Share List sidebar, select Yes for Would you like to assign editors from the selected accounts?
- Note: Only Admin users assigned to the same account can be added as editors.
- To allow all eligible users to edit the list, select the Select All checkbox. To grant editing access to specific users, select the checkbox next to each desired user.
- Click the Save button within the sidebar to apply your changes.
Delete a List
Note: If a Lock icon appears next to a list name, only the list owner can delete the list. Additionally, you must be signed in to your Imperial Brady account to follow the instructions below.
- To delete a shopping list, select the My Lists icon located in the upper-right corner of the main menu.
- Note: If the list you wish to delete is not visible, use the Search by list name field. You can also narrow your results using the All Lists and Sort By: Date Modified dropdown filters.
- Locate the list you wish to delete.
- Select the three vertical dots next to the list, then click Delete.
- When the Are you sure you want to delete this list? pop-up appears, click the Delete button to confirm.
Download a List as an Excel File
Note: If a Lock icon is visible next to a list’s name, only the list owner can make changes. Any changes made by the list owner will update automatically. Additionally, you must be signed in to your Imperial Brady account to follow the instructions below.
- To download a shopping list as an Excel file, select the My Lists icon located in the upper-right corner of the main menu.
- Note: If the list you wish to export is not visible, use the Search by list name field. You can also narrow your results using the All Lists and Sort By: Date Modified dropdown filers.
- Select the list name you wish to download.
- Click List Actions, then select Download Excel. The shopping list will be downloaded to your device.
Download a List as an PDF
Note: If a Lock icon is visible next to a list’s name, only the list owner can make changes. Any changes made by the list owner will update automatically. Additionally, you must be signed in to your Imperial Brady account to follow the instructions below.
- To download a shopping list as an PDF file, select the My Lists icon located in the upper-right corner of the main menu.
- Note: If the list you wish to download is not visible, use the Search by list name field. You can also narrow your results using the All Lists and Sort By: Date Modified dropdown filers.
- Select the list name you wish to download.
- Click List Actions, then select Download PDF. The shopping list will be downloaded to your device.
Print a List
Note: If a Lock icon is visible next to a list’s name, only the list owner can make changes. Any changes made by the list owner will update automatically. Additionally, you must be signed in to your Imperial Brady account to follow the instructions below.
- To print a shopping list, select the My Lists icon located in the upper-right corner of the main menu.
- Note: If the list you wish to print is not visible, use the Search by list name field. You can also narrow your results using the All Lists and Sort By: Date Modified dropdown filters.
- Select the list name you wish to print.
- Click List Actions, then select Print.
- In the Print sidebar, select the desired product information you wish to print.
- Click the Print button to proceed.
- Note: Printing steps may vary depending on your device and web browser.
Order from an Existing List
Note: You must be signed in to your Imperial Brady account to follow the instructions below.
- To order from an existing list, select the My Lists icon located in the upper-right corner of the main menu.
- Note: If the list you wish to use is not visible, use the Search by list name field. You can also narrow your results using the All Lists and Sort By: Date Modified dropdown filters.
- Select the List name you wish to order from.
- Select the checkbox next to each product you wish to add to your cart.
- Click the Add Item(s) to Cart button.
- Select the Cart icon located in the main menu to proceed to checkout.
- Select a Requested Delivery Date from the dropdown menu.
- Optional: If a purchase order is required, enter the PO number in the Purchase Order field.
- Review your order, then click the Submit Order button to place your order.
Upload a List
Note: You must be signed in to your Imperial Brady account to follow the instructions below.
- 1. To upload items to a shopping list, select the My Lists icon located in the upper-right corner of the main menu.
- Note: If the list you wish to edit is not visible, use the Search by list name field. You can also narrow your results using the All Lists and Sort By: Date Modified dropdown filters.
- Select the list name you wish to upload items to.
- Click the Quick Add button.
- Note: To help ensure your shopping list uploads correctly, we recommend using the provided template. If your shopping list file is already prepared and ready to upload, proceed to Step 7.
- Click the Download Template link, then open the downloaded file.
- Note: Products can be uploaded using either the SKU number or manufacturer number. A maximum of 200 products can be uploaded at one time. Before uploading, ensure your file contains no more than 200 products.
- Enter the SKU number or manufacturer number and the desired quantity for each product.
- Note: If a quantity is not entered, the product will be uploaded with a default quantity of 1.
- Save the completed file in XLSX or CSV format.
- Return to the Quick Add sidebar, then click the Upload Excel/CSV button.
- Review the message displayed in the pop-up, then click the Continue button to proceed.
- Optional: Select Don’t show this message again if you do not wish to see this message during future uploads.
- Select the XLSX or CSV file you wish to upload, then click the Open button to upload the file.
- Note: If any additional actions are required to complete the file upload, the system will notify you.
Add Items to an Existing List from a Product Page
Note: If a Lock icon is visible next to a list’s name, only the list owner can make changes. Any changes made by the list owner will update automatically. Additionally, you must be signed in to your Imperial Brady account to follow the instructions below.
- To add a product to a shopping list from the product page, click the Add to List(s) icon located next to the Add to Cart button.
- In the Add to List(s) sidebar, select the shopping list(s) you wish to add the product to.
- Click the Update List(s) button to add the product to the selected shopping list(s).
Add Products to an Existing Shopping List from Category Results
Note: If a Lock icon is visible next to a list’s name, only the list owner can make changes. Any changes made by the list owner will update automatically. Additionally, you must be signed in to your Imperial Brady account to follow the instructions below.
- When browsing a product category page, click the Add to List(s) icon located in the upper-right corner of the desired product image.
- In the Add to List(s) sidebar, select the shopping list(s) you wish to add the product to.
- Click the Update List(s) button to add the product to the selected shopping list(s).
Activate My Account
Note: You must have an active Imperial Brady account to follow the instructions below.
- To activate your account, access the email address associated with your Imperial Brady account and locate the email with the subject line Welcome to Imperial Brady, sent from customersupport@imperialdade.com.
- Note: The activation link is valid for 72 hours. If the link expires before you activate your account, please submit a request to Customer Support to have a new activation email sent.
- Click the Complete Registration button in the email.
- Enter your desired username in the Username field.
- Note: Your username must meet all listed username requirements.
- Enter your desired password in the Password and Confirm Password fields.
- Note: Your password must meet all listed password requirements.
- Click the Submit button to activate your account.
Sign In My Account
Note: You must have an active Imperial Brady account to follow the instructions below.
- Click Sign in to access the sign-in sidebar.
- Enter your username and password in the appropriate fields.
- Optional: Select Remember Me to save your username and password for future access.
- Click the Sign in button to access your account.
Forgot Password
Note: You must have an active Imperial Brady account to follow the instructions below.
- Click Sign in to access the sign-in sidebar.
- Select "Forgot Password?"
- Enter your username in the appropriate field.
- Click the Send reset code button.
- Note: Check the email address associated with your account for an email from reply@mail.imperialdade.com with the subject “Imperial Brady Reset Password Instructions.” If you do not see the email, check your Junk or Spam folder. You can also confirm that you are using the correct username by selecting Forgot Username.
- Copy the reset code provided within the email, then click the Reset your password button.
- Enter the reset code in the appropriate field.
- Enter your new password in the Password and Confirm Password fields.
- Note: Your new password must meet all password requirements.
- Click the Create Password button to save your new password.
Forgot Username
Note: You must have an active Imperial Brady account to follow the instructions below.
- Click Sign in to access the sign-in sidebar.
- Select "Forgot Username?"
- Enter the email address associated with your account in the Email Address field.
- Click the Continue button to proceed.
- Note: If the email address you entered is associated with an account, you should receive an email within a few minutes. If you do not see the email, check your Junk or Spam folder.
- Check your inbox for an email from no-reply@imperialdade.com with the subject Forgot Your Username. Once received, open the email to retrieve your username.
Note: If you need additional assistance, please contact Customer Support.
View Invoices & Invoice History
Note: You must be signed in to your Imperial Brady account and have either the Admin or Finance user role to follow the instructions below.
- Hover over the Profile icon located in the upper-right corner of the main menu and select Invoices.
- Note: If the invoice you wish to view is not visible, use the Search open invoices search bar. You can also narrow your results using the All-time and Filter options.
- Select the desired Invoice # to view the invoice details.
- Note: To download a copy of the invoice, click the Export PDF button. The invoice will be downloaded as a PDF and saved to your Downloads folder.
Add a Payment Method & Pay an Invoice Online
Note: You must be signed in to your Imperial Brady account and have either the Admin or Finance user role to follow the instructions below. Additionally, before proceeding, ensure that the invoice you wish to pay is selected.
- Hover over the Profile icon located in the upper-right corner of the main menu and select Invoices.
- Note: If the invoice you wish to view is not visible, use the Search open invoices search bar. You can also narrow your results using the All-time and Filter options.
- Select the desired Invoice # to view the invoice details.
- Click the Pay button located near the upper-right corner of the invoice.
- Click the Add payment method button.
- Select either Add bank account or Add credit/debit card.
- Enter the required payment information in the appropriate fields.
- Optional: Select Set as default payment method if you would like to use this as your default payment method.
- Click the Add button to save the payment method.
- Verify the desired payment method is selected, then click the Confirm selection button.
- On the Invoice Payment page, review your payment information, then click the Submit payment button to process your payment.
Note: Payments made by credit card are subject to a 2% convenience fee, which will be added to the total amount charged. Payments made by ACH or debit card will not incur a convenience fee.
Set Up AutoPay
Note: You must be signed in to your Imperial Brady account and have either the Admin or Finance user role to follow the instructions below.
- Hover over the Profile icon located in the upper-right corner of the main menu and select Payments.
- Click the Set up AutoPay link. The Streamline Your Payments with AutoPay sidebar will appear.
- Click the Set up AutoPay button.
- Click the Add payment method button.
- Select either Add bank account or Add credit/debit card.
- Enter the required payment information in the appropriate fields.
- Click the Add button to save the payment method.
- Click the Continue button.
- In the Review & confirm autopay Setup section, select the authorization checkbox to authorize automatic payments.
- Click the Confirm and activate button.
- Click the Done button to complete the AutoPay setup.
Cancel Autopay
Note: You must be signed in to your Imperial Brady account and have either the Admin or Finance user role to follow the instructions below.
- Hover over the Profile icon located in the upper-right corner of the main menu and select Payments.
- Click the Manage link.
- In the Manage autopay sidebar, click the Cancel autopay button.
- When the Confirm Cancellation pop-up appears, click the Cancel autopay button to confirm.
Change Accounts
Note: You must be signed in to your Imperial Brady account to follow the instructions below.
- To change the currently selected account, click the Shopping For dropdown located below the main menu.
- In the Select an Account to Shop For sidebar, select the dropdown arrow next to the desired company, then select the desired account.
- Once the account has been selected, click Next.
- In the Select Delivery Address sidebar, select the desired delivery location.
- Click Done to save your selection and update the account and delivery location.
Place an Order
Note: You must be signed in to your Imperial Brady account to follow the instructions below.
- Once all desired items have been added to your cart, click the Cart icon located in the upper-right corner of the main menu.
- Note: To remove a product from your cart, click the Remove link next to the product. To change the quantity, update the Qty field for the desired product. To remove all products from your cart, click the Clear Cart link.
- Select a Requested Delivery Date from the dropdown menu.
- Note: Please note that delivery availability may vary slightly based on your established delivery schedule and distribution center routing.
- Optional: If a purchase order is required, enter the PO number in the Purchase Order field.
- Review your order details, then click the Submit Order button to place your order.

Expert Sales. Dependable Support. Unmatched Service.
Thank you for being a part of the Imperial Brady family.
If you have any questions, please contact your local sales rep or reach out to our digital success team.